
As somebody who worked creating video marketing content for a privately held company, through IPO to acquisition, I have seen the power that video can have on a business. With video auto-playing on major social media feeds, it’s an amazing way to capture the attention of your target audience, whether you are growing your company organically or with paid acquisition strategies. Stop Motion specifically is a great way to create compelling looping videos for your product based businesses.
And the best part? You don’t need to hire an expensive videographer or buy fancy cameras, you can shoot everything straight from your phone. What is stop motion exactly and how can benefit your business? Stop-motion is a sequence of photos that are stitched together creating magical results with minimal time commitment. Say goodbye to stock footage and hello to videos featuring YOUR products!


I understand a lot of you are wearing 10 different hats, hustling to grow your business, so I’m here to share that creating video doesn’t have to be an overwhelming task and you will be pleased with the benefits. If you’re not convinced yet, here are some recent stats on video marketing:
Including video on landing pages can increase conversion rates by 80%.
Including Video in Email Increases Click Through Rates by 200%-300%
Online video ads are getting 3x more clicks on average than other digital ad formats, including mobile, display and rich media ads
10 TIPS TO CREATING PRODUCT VIDEOS WITH STOP MOTION
Step 1: Download the free stop motion app called Life Lapse. (Link: https://lifelapse.app.link/ZghfRvzkGU)
Step 2: Start a new project
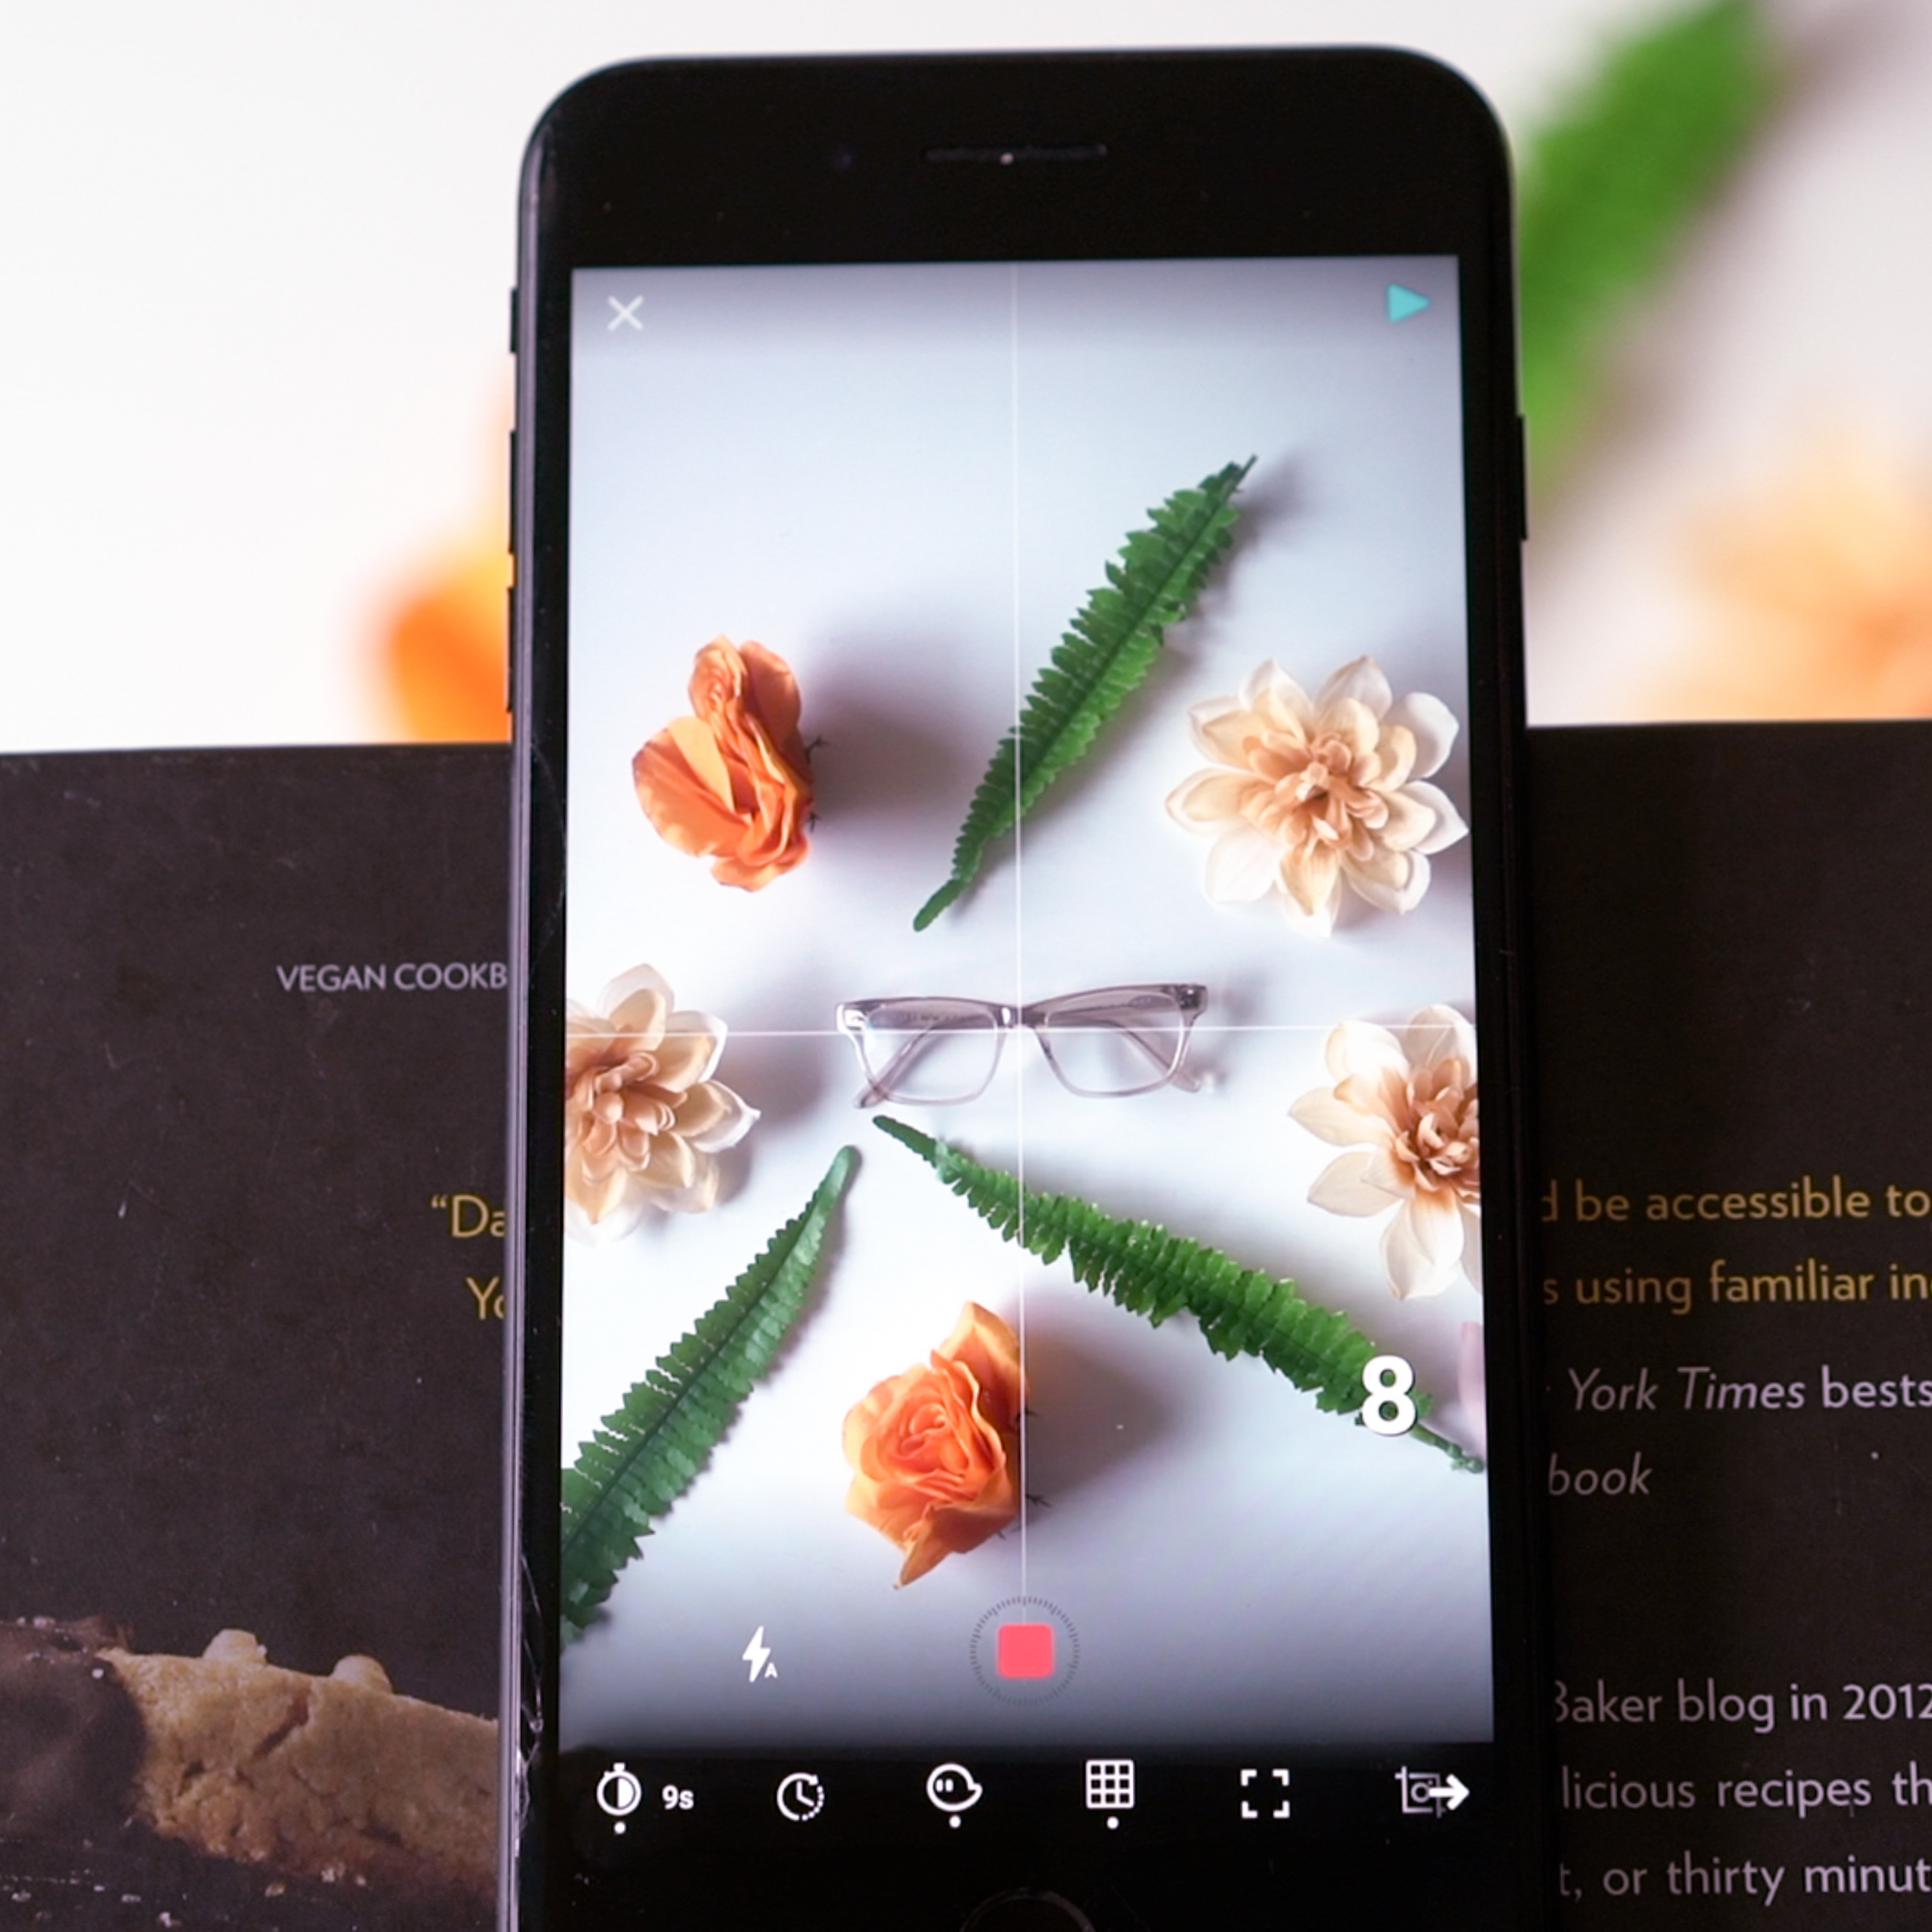
Step 3: Set up the shot: Though daylight is beautiful, we only advise shooting near a window if the lighting conditions are consistent outside. Why? Because the light can change as you are shooting the video (sun going in and out of clouds), you will start with a bright shot then but the end it will be dark, which will result in flickering through the video. Since it was a very cloudy day in Vancouver when I shot these videos, I decided to use window light, otherwise I’d recommend shooting under in a controlled lighting environment with a lamp.

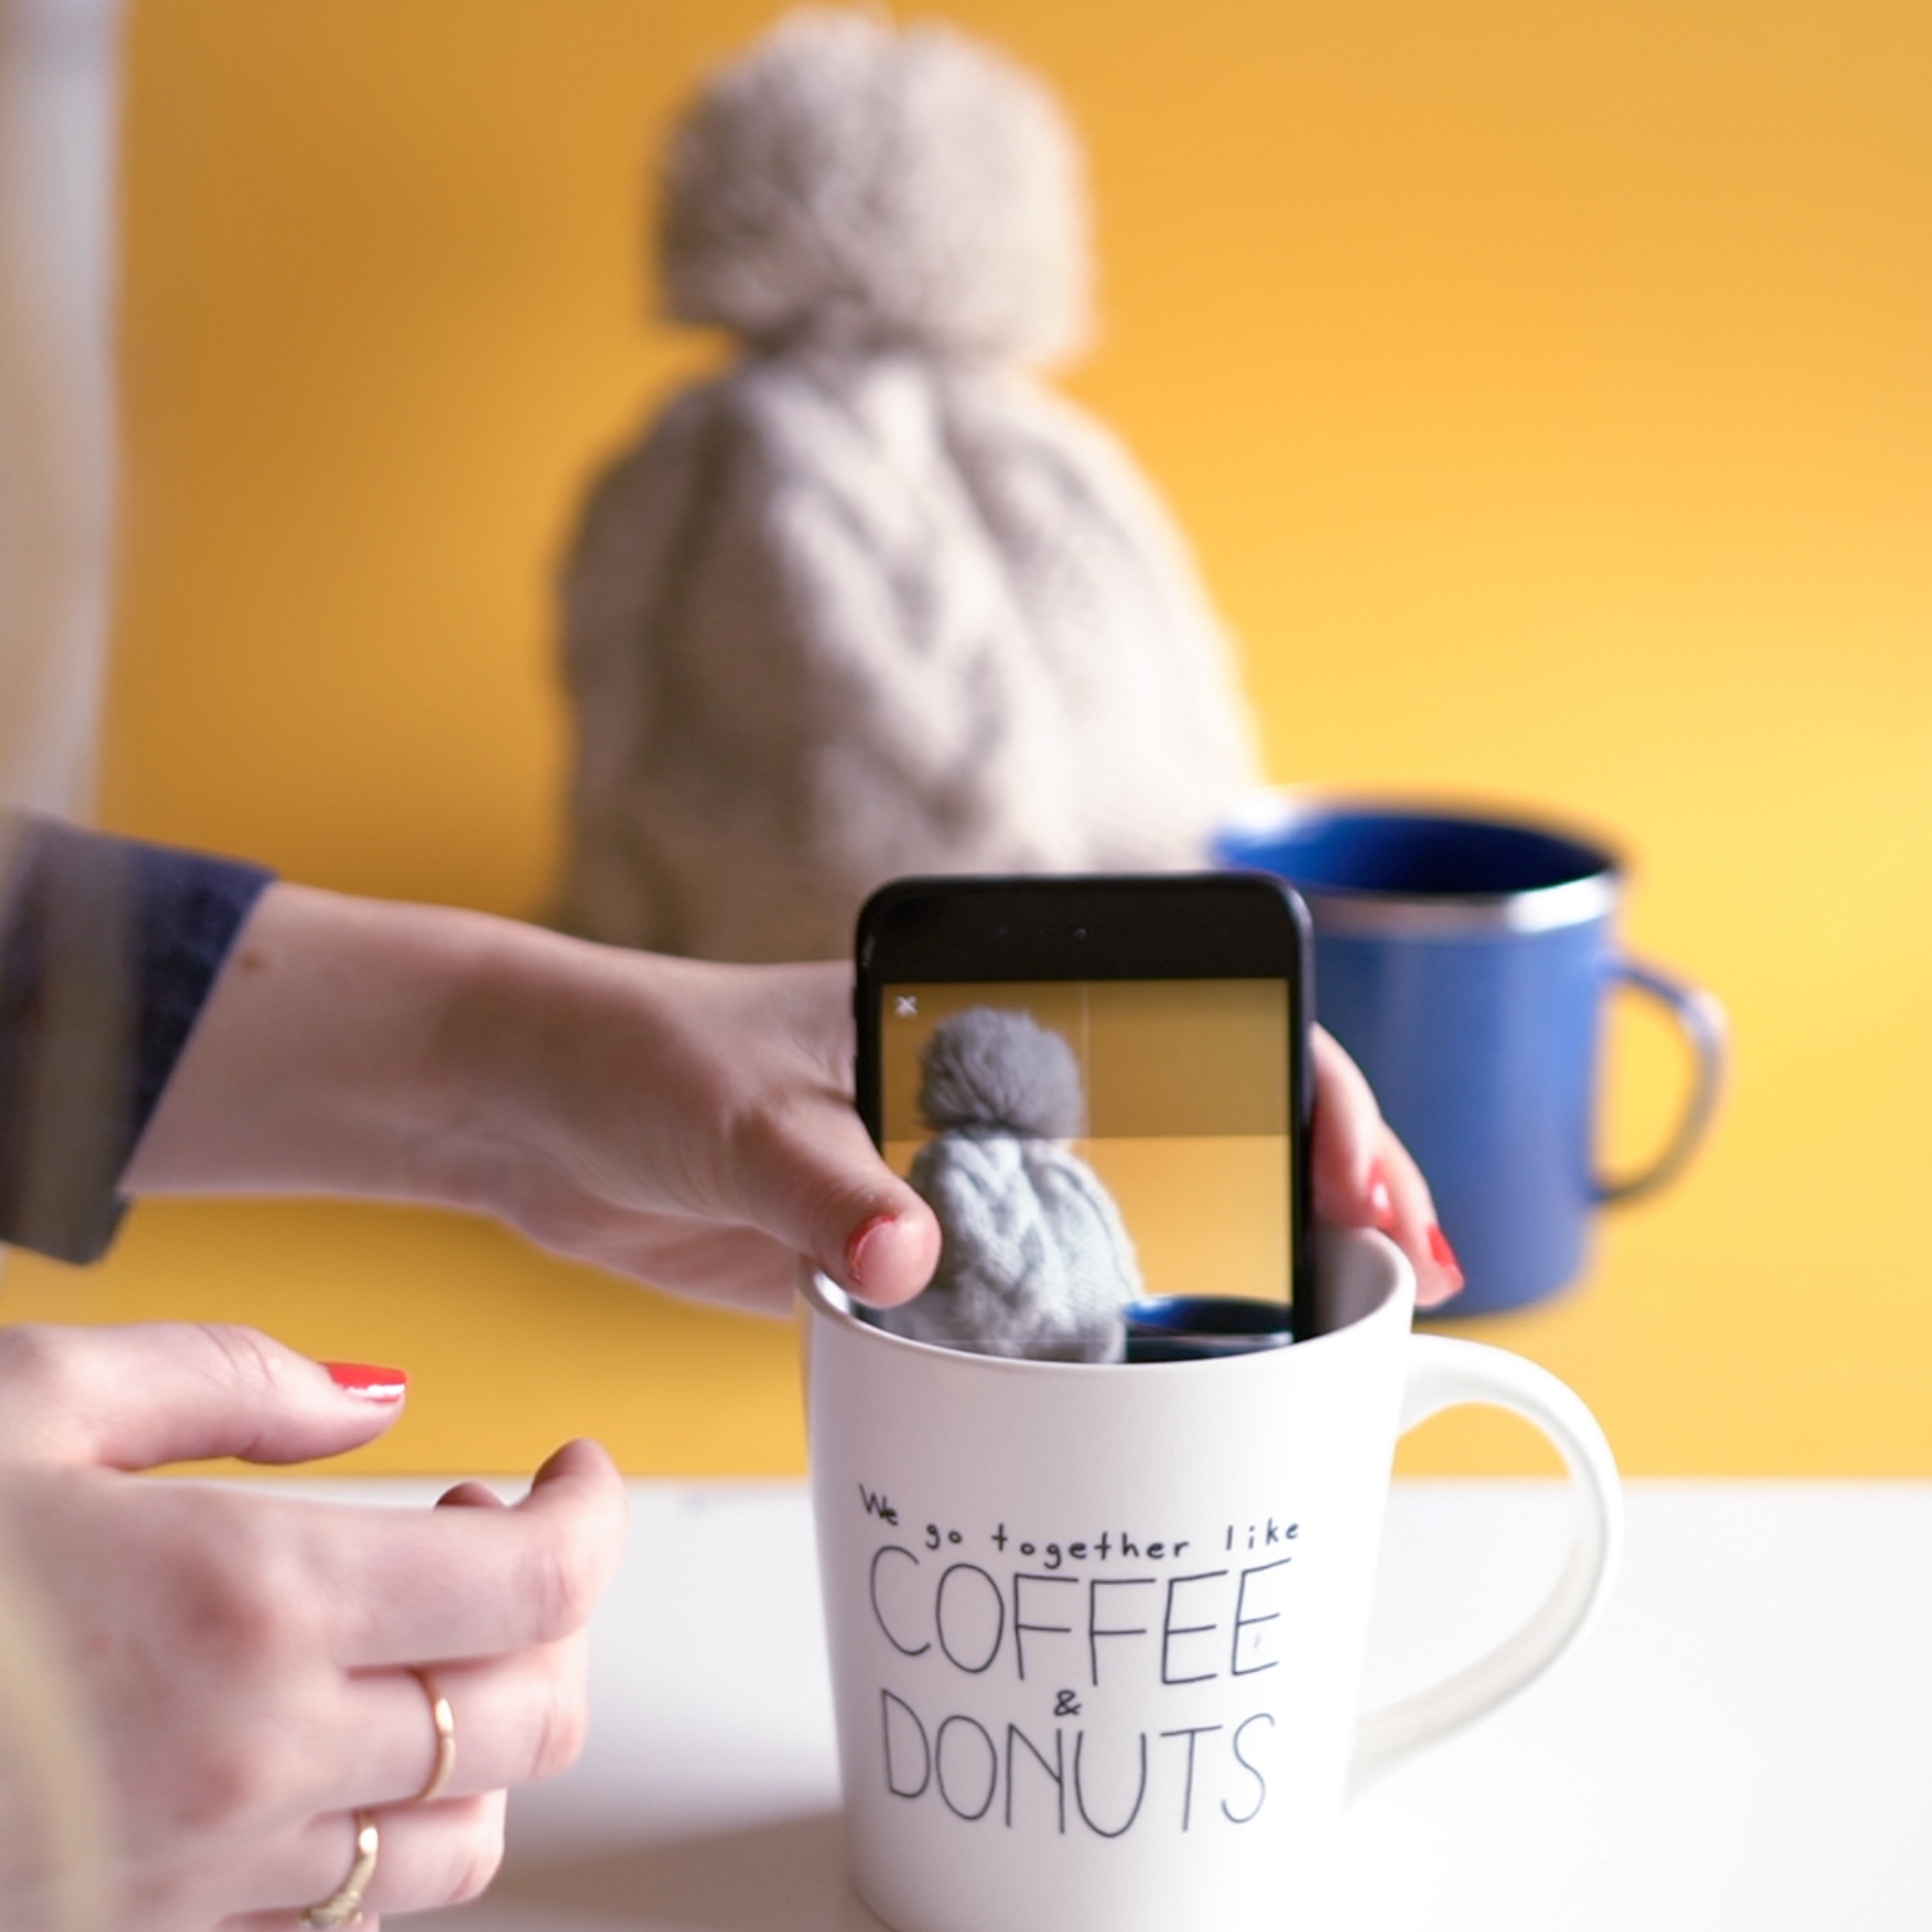
Step 4: Set up your phone so it doesn’t move... at all. If you move the phone throughout your video, it will look very sloppy. Typically with stop motion, you need to own a tripod. I know everybody doesn’t own a tripod, which is why I like to provide DIY hacks! If you’re shooting a flat-lay video like in the image on the left, put some books on the edge of a chair and then the phone on the edge of the books. If you don’t have the books there, you’ll get the legs the chair in your shot, which you don’t want. If you’re shooting an upright video, place your phone into a mug or cup. I have a sock at the bottom of this mug so I had more control over the tilt of the phone.
Step 5: Change the auto-lock on your phone to “never”. To do this open the Settings App > Display & Settings > Auto-lock > Never. This will prevent your phone from turning off midway through your shoot. If you don’t have this turned to never and it takes you 5 minutes to complete the video, you won’t be capturing anything after the phone locks.
Step 6: Next, lock the white balance & exposure so the camera doesn’t auto adjust as your objects more around. This will also prevent flickering light throughout your video.
Step 7: Set up the interval timer and make sure volume switch on the side of your phone is turned on, this way you know each time the camera takes a picture with the shutter noise. You want this featured turned on because it’s important that you don’t move the phone once you start shooting so the focus can be on the products moving around vs the products + the background.
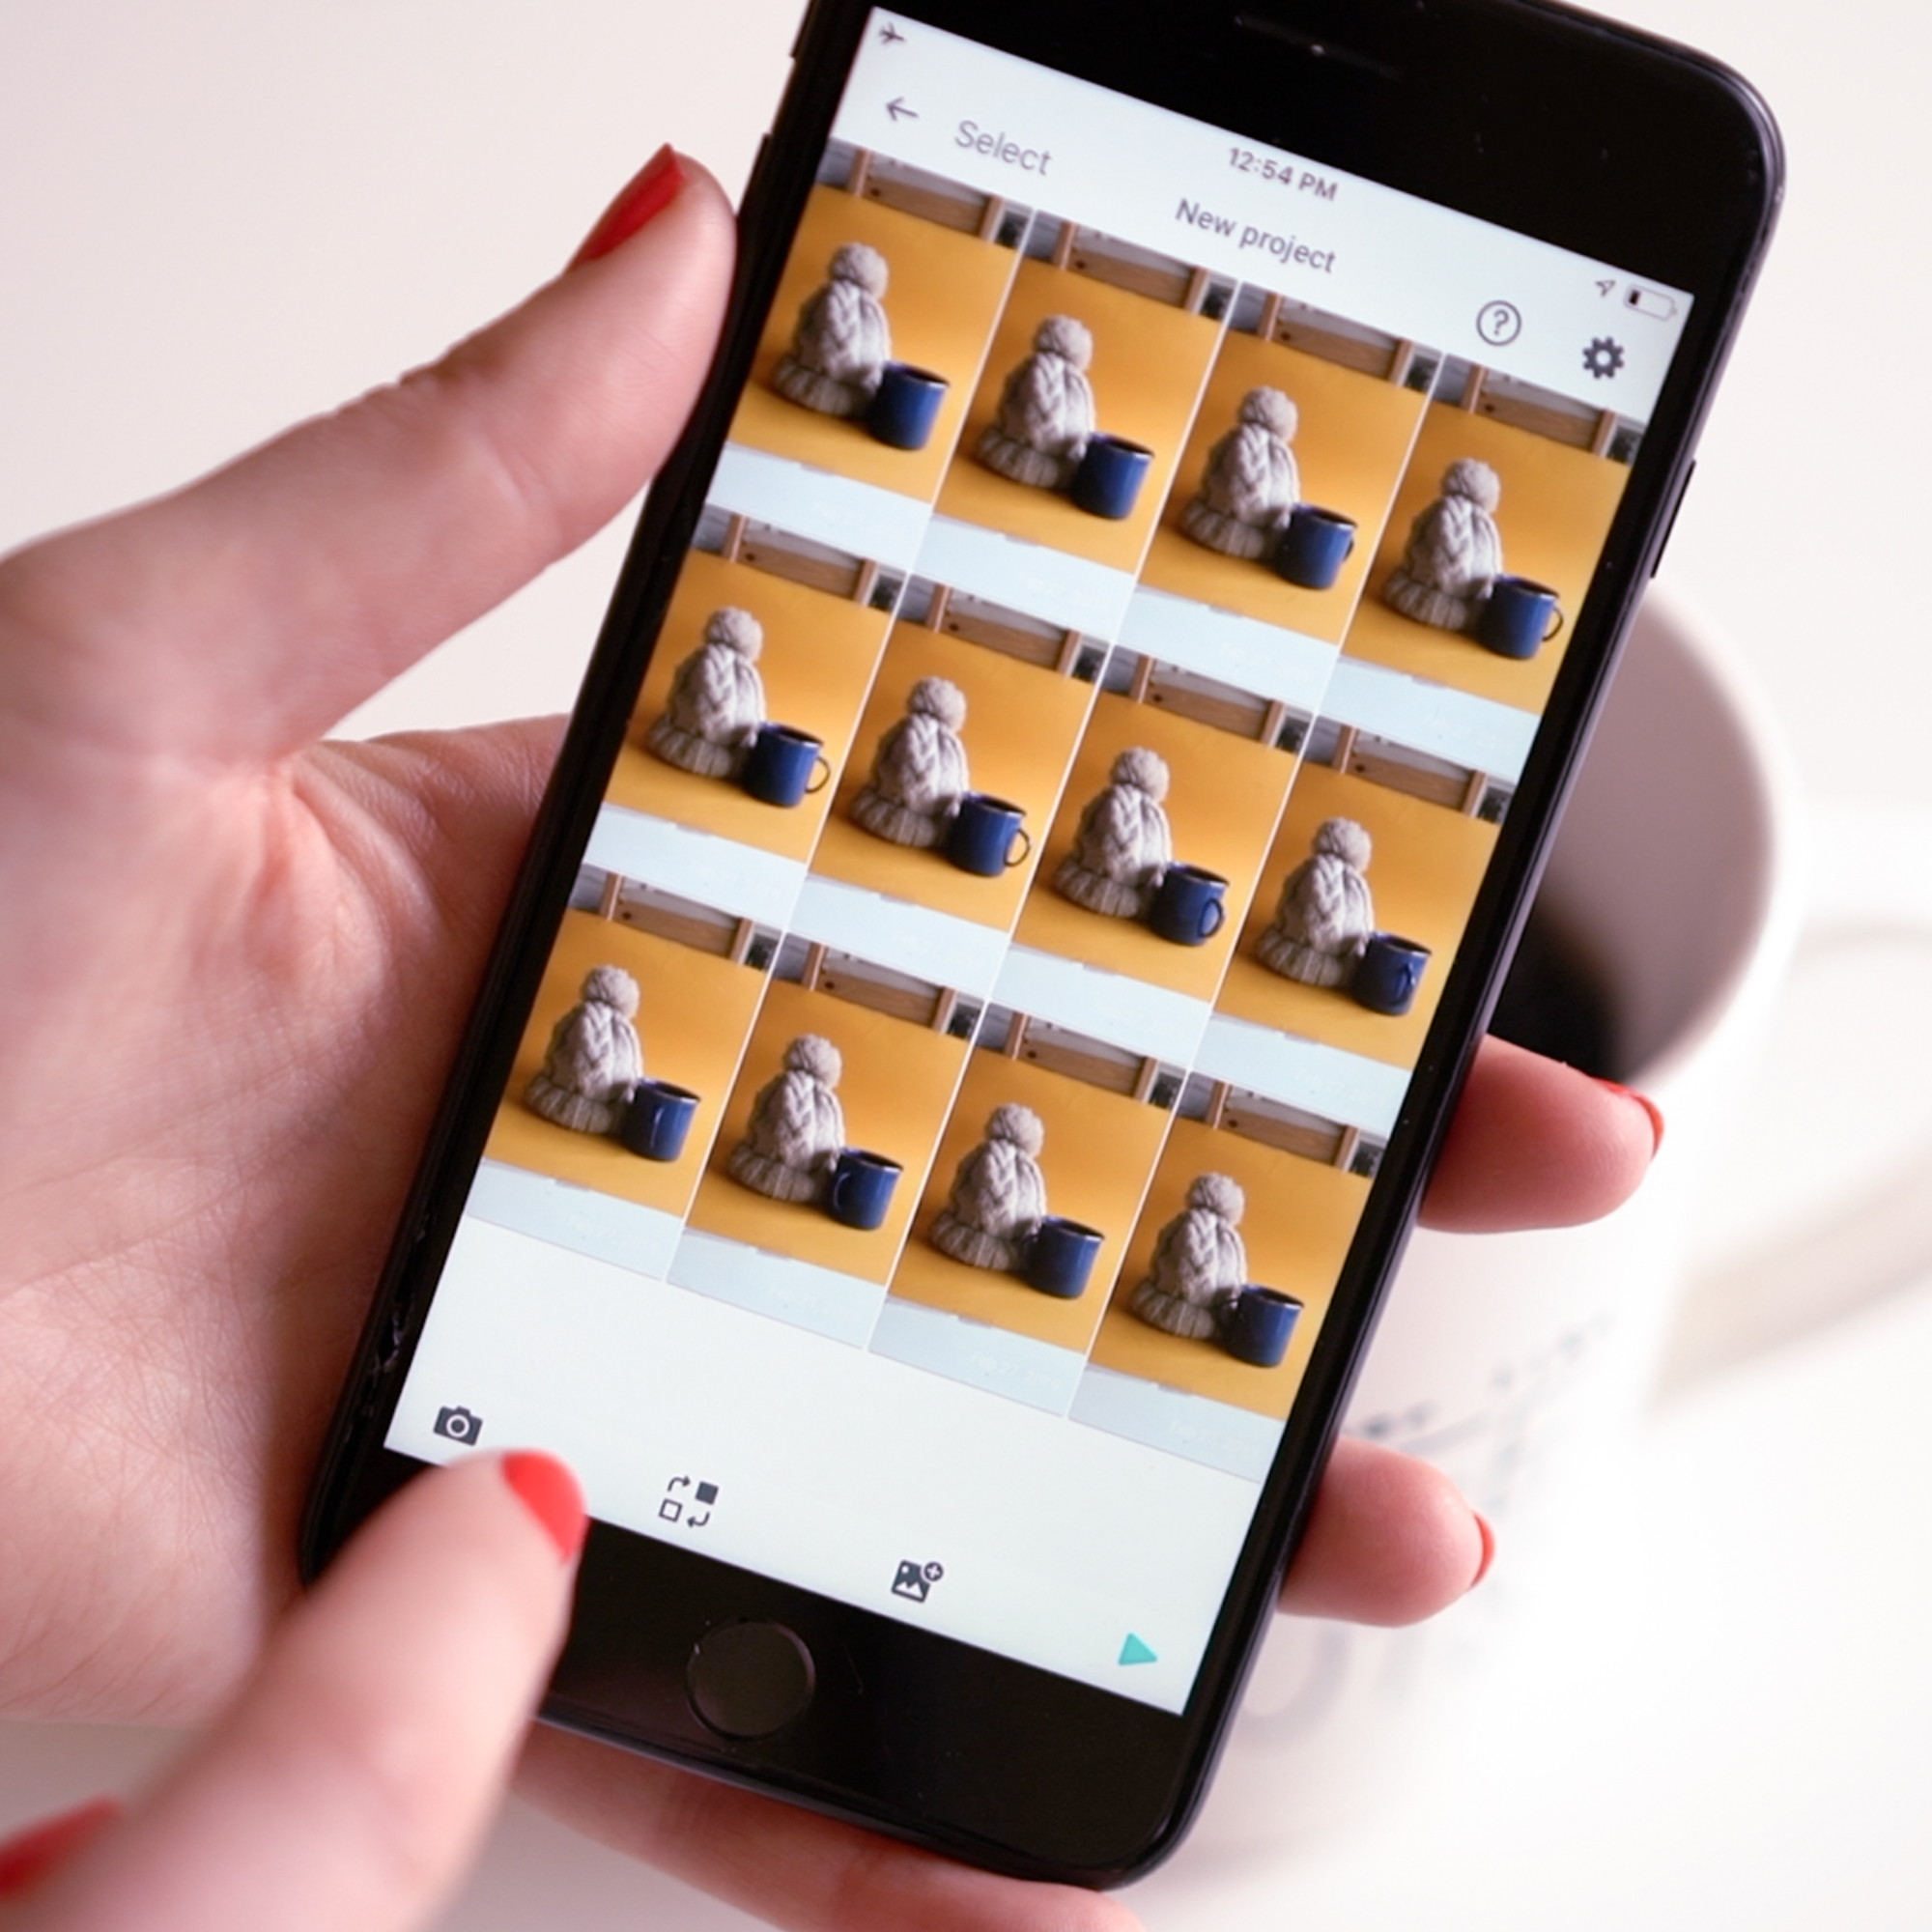
Step 8: Start the interval timer and start shooting! This is the fun part where you can bring your products to life and animate them. Take your first picture, move the product a little bit, wait for the timer to go off to take the next picture, rinse and repeat! Do not stress or worry if it takes the picture while your hand is in there or you are mid-movement. I would recommend starting with minimal movements of the product. Use the apps ghosted image feature to understand the movements. See example below:

Step 9: Delete the shots that your hands are in!
Step 10: Press the play and watch your product come to life! From the player, you can add music, filters, boomerang the video, change the size & speed. The auto setting for the app’s speed is likely pretty slow, so feel free to speed it up. Once you’re happy with the result, scroll to the far right of the app and save the video.
Here’s some ideas on where you can place the finished stop motion videos:
Ads
Landing pages
Product pages
Emails
Social media